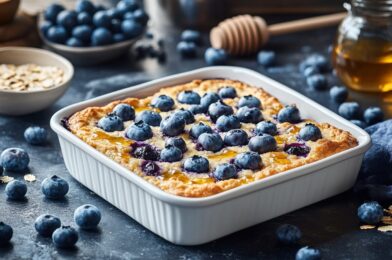
Sour Cream Blueberry Coffee Cake

I just took a delicious trip down memory lane with this Sour Cream Blueberry Coffee Cake that brought me back to my childhood. This is the kind of cake that is perfect for a lazy Sunday morning, a cozy afternoon tea, or even as a delightful dessert after a hearty dinner. With its tender crumbs, bursts of juicy blueberries, and a subtle tang from the sour cream, it’s a true crowd-pleaser!

The secret to its irresistible flavor lies in the combination of fresh blueberries and a generous helping of sour cream in the batter. The blueberries add a delightful pop of color and a burst of sweetness, while the sour cream provides a subtle tang and moisture, ensuring each bite is utterly scrumptious. This coffee cake is not just about the blueberries, though; it’s also about the tender crumbs that melt in your mouth and the subtle cinnamon swirl that adds a hint of warmth to every slice.
-2 cups (250g) all-purpose flour
-1 teaspoon baking powder
-1/2 teaspoon baking soda
-1/2 teaspoon salt
-1/2 cup (1 stick) unsalted butter, softened
-1 cup (200g) granulated sugar
-2 large eggs
-1 teaspoon vanilla extract
-1 cup (240ml) sour cream
-2 cups (290g) fresh blueberries

To begin, you’ll need to gather some simple ingredients likely already in your pantry and refrigerator. All-purpose flour, baking powder, baking soda, salt, butter, sugar, eggs, vanilla extract, and sour cream form the foundation of this delightful cake. And, of course, the star of the show: fresh blueberries.

Start by preheating your oven to 350°F (175°C). Grease a 9-inch (23 cm) springform pan and set it aside. Sift the flour, baking powder, baking soda, and salt together in a medium bowl and set that aside too.

In a large mixing bowl, cream the softened butter and sugar until light and fluffy. Add the eggs one at a time, mixing well after each addition. Then stir in the vanilla extract.

Now, it’s time to add the dry ingredients and sour cream alternately to the wet mixture, beginning and ending with the dry ingredients. Gently fold in the blueberries, being careful not to overmix the batter.

Pour the batter into your prepared pan and sprinkle a cinnamon-sugar mixture on top for a crispy, flavorful finish. Pop it into the oven and bake for about 50-60 minutes until a toothpick inserted into the center comes out clean.

As the cake bakes, your kitchen will be filled with the mouthwatering aroma of blueberries and cinnamon. When it’s ready, let it cool in the pan for a few minutes before transferring it to a wire rack to cool completely.

This Sour Cream Blueberry Coffee Cake is best served warm, and trust me, it won’t last long on the cooling rack! Whether you’re enjoying it with a cup of coffee in the morning or as a special treat after dinner, this cake is sure to delight your taste buds. So, why not give it a try and create some unforgettable memories in your kitchen?
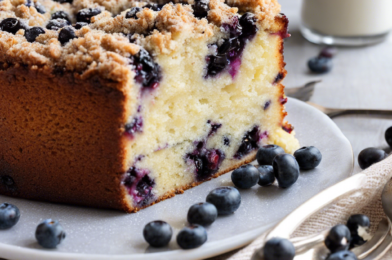
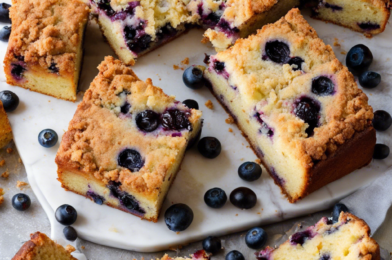
Sour Cream Blueberry Coffee Cake

I just finished baking a delicious Sour Cream Blueberry Coffee Cake, and it’s a treat that’s hard to resist! This coffee cake is a perfect blend of tangy and sweet, with a tender crumb and a generous blueberry filling. It’s the kind of cake that’s ideal for a cozy morning breakfast or as a delightful afternoon snack. The sour cream in the recipe adds a subtle richness and moisture to the cake, ensuring every bite is simply irresistible.

When it comes to breakfast pastries, coffee cakes have always held a special place in my heart. They’re comforting and versatile, perfect for any time of day. This particular coffee cake recipe is a family favorite, passed down through generations. The addition of blueberries makes it even more tantalizing, as the juicy berries burst with flavor in every bite. It’s a fantastic way to add a fruity twist to your traditional coffee cake.

To begin, you’ll need fresh or frozen blueberries, ensuring they are well-coated with flour to prevent sinking in the batter. The cake itself is a beautiful blend of butter, sugar, eggs, and, of course, sour cream. The sour cream not only adds flavor but also contributes to the cake’s delightful texture. As the cake bakes, your kitchen will fill with an aroma that is simply heavenly.

The preparation of this coffee cake is straightforward and easy to follow. It’s a great recipe for beginner bakers looking to impress their friends and family. The key to achieving that perfect texture is in the mixing of the batter. Be careful not to overmix, as this can result in a tougher cake.

The beauty of this cake lies in its simplicity. It’s not overly complicated to make, but the flavor and texture will wow your taste buds. Whether you’re enjoying a warm slice fresh out of the oven or savoring it at room temperature, this Sour Cream Blueberry Coffee Cake is a delightful treat that will be requested time and again.

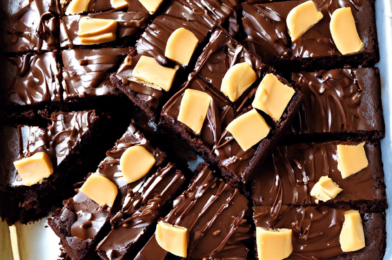
peanut butter mississippi mud brownies

These peanut butter Mississippi mud brownies are the ultimate decadent treat for any peanut butter and chocolate fan. Imagine biting into a rich, fudgy brownie, only to discover a creamy peanut butter surprise within, all topped with a gooey marshmallow and chocolate layer. This dessert is a true showstopper and will satisfy your sweet cravings like no other!

To start, preheat your oven and prepare a baking pan by lining it with parchment paper. This ensures easy removal and clean-up later. The brownie base is a simple yet indulgent blend of butter, sugar, cocoa powder, eggs, flour, and a secret ingredient—coffee. Yes, coffee! It enhances the chocolate flavor without adding a coffee taste. Mix these ingredients until well combined, then spread the batter into the prepared pan. Bake until a toothpick comes out mostly clean with a few moist crumbs attached.

While the brownies are baking, prepare the peanut butter layer. This is where the magic happens! Mix peanut butter, powdered sugar, and softened butter until smooth and creamy. This filling is then spread over the warm brownies, creating a delicious, gooey center.

Next, prepare the marshmallow topping by melting marshmallows and spreading them evenly across the peanut butter layer. For the final touch, a chocolate sauce is drizzled on top, which you can make by melting chocolate chips and butter together. This chocolate drizzle takes these brownies from amazing to extraordinary.

These brownies are best served warm, so the peanut butter filling and chocolate drizzle are extra gooey. They are perfect for sharing at parties, potlucks, or any gathering. Your guests will be raving about these treats and will likely ask for the recipe!

If you’re a fan of classic American desserts, these brownies are a must-try. They combine the iconic flavors of the South, bringing a delightful twist to traditional Mississippi mud pie. With their multiple layers of flavor and texture, these brownies are a true delight for the senses. Whether you’re a seasoned baker or just starting, this recipe is easy to follow and yields impressive results.

Fiery Chicken Ramen with Creamy Garlic Sauce

# Indulge in the Ultimate Comfort Food: Fiery Chicken Ramen with a Twist

Get ready to spice up your taste buds and warm your soul with this extraordinary ramen creation! Fiery Chicken Ramen with Creamy Garlic Sauce is not your typical ramen; it’s an explosion of flavors that will tantalize your palate and leave you craving more. Imagine tender chicken, fiery spices, and the rich, creamy garlic sauce coming together to create a culinary masterpiece.

In the heart of this ramen lies the perfect combination of spices. A delicate dance of chili flakes and Sriracha sauce sets the stage for a fiery adventure. But fear not, as the heat is beautifully balanced by the creamy garlic sauce, made with butter, heavy cream, and freshly minced garlic. This sauce adds a luscious texture and a unique twist to the traditional ramen experience.

The preparation begins with cooking the chicken. Boneless, skinless chicken thighs are seasoned with salt and pepper, then seared to golden perfection, locking in the juices and ensuring a tender bite. Meanwhile, the broth simmering on the stovetop infuses the flavors of chicken bones, vegetables, and aromatic spices, creating a flavorful foundation for the ramen.

As the ramen comes together, cooked ramen noodles are added to the hearty broth, followed by the seared chicken and a generous drizzle of the creamy garlic sauce. The final touch is a sprinkle of chopped green onions, providing a refreshing contrast to the rich flavors.

This ramen is not just a dish; it’s an experience. The first spoonful delivers a burst of flavors – the fiery kick from the chili and Sriracha, the soothing creaminess from the garlic sauce, and the comforting warmth of the broth. It’s a perfect harmony that will satisfy your craving for spice and comfort.

For those who dare to venture beyond the ordinary, Fiery Chicken Ramen with Creamy Garlic Sauce awaits. It’s a culinary journey that will leave a lasting impression and have you craving that unique, creamy garlic twist. So, gather your ingredients, follow the recipe, and embark on a ramen adventure like no other. Your taste buds will thank you!

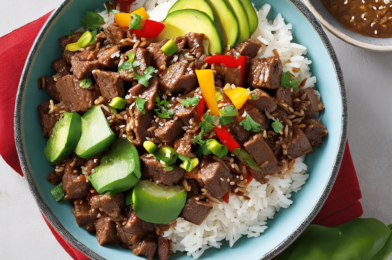
Beef and Pepper Rice Bowl

Beef and Pepper Rice Bowl: A Quick and Delicious Comfort Food

Are you craving a hearty and flavorful meal that’s easy to prepare? Look no further than the Beef and Pepper Rice Bowl, a delicious dish that combines tender beef, sweet bell peppers, and fragrant rice. This savory bowl of goodness is sure to satisfy your hunger and comfort your soul, making it the perfect option for busy weeknights or cozy weekends alike.

Prepping this dish is a breeze. You’ll start by marinating thinly sliced beef in a simple mixture of soy sauce, rice wine, and cornstarch. This step ensures that the beef remains tender and flavorful throughout the cooking process. While the beef is marinating, you’ll chop some vibrant bell peppers and onions, adding a splash of color and crisp texture to the dish.

Once the beef is ready, it’s time to fire up your wok or skillet. Cooking this dish quickly over high heat is key to achieving that perfect sear on the beef and retaining the crunch of the vegetables. Toss in the beef, and as it starts to brown, add the colorful peppers and onions. Stir-fry everything together until the vegetables are tender-crisp and the beef is cooked to your desired doneness.

What sets this dish apart is the sauce. A simple combination of beef broth, soy sauce, and a touch of sugar creates a mouthwatering glaze that coats every bite. As the sauce reduces, it thickens slightly, clinging to the beef and vegetables. This step adds an incredible depth of flavor that will have your taste buds dancing.

Finally, serve this savory stir-fry over a bed of steamed rice. The warm, fluffy rice absorbs the flavorful sauce, creating a delightful blend of textures and tastes. This dish is all about comfort and satisfaction, so don’t hold back on portion sizes—a generous helping ensures you get a hearty taste of everything in each bite.

The Beef and Pepper Rice Bowl is a quick, easy, and incredibly tasty meal that will become a go-to favorite for your family. With its vibrant colors, enticing flavors, and simple preparation, it’s sure to be a hit with both kids and adults alike. So, the next time you’re looking for a delicious and convenient meal, give this recipe a try—your taste buds will thank you!

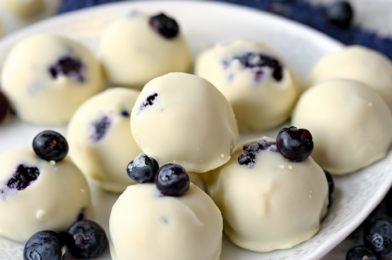
white chocolate blueberry truffles

Indulge in the exquisite combination of rich white chocolate and the subtle sweetness of blueberries with these white chocolate blueberry truffles. These decadent treats not only satisfy your sweet tooth but also provide a delightful sensory experience.

To create these truffles, you’ll embark on a culinary journey, starting with the selection of high-quality white chocolate. The key to achieving the perfect melt-in-your-mouth texture lies in choosing a premium brand with a high cocoa butter content. As you gently melt the chocolate, the aromatic scent will fill your kitchen, setting the stage for a truly indulgent creation. Once the chocolate transforms into a smooth, silky liquid, it’s time to introduce the star ingredient: blueberries. Fresh, ripe blueberries are folded into the warm chocolate, their vibrant color contrasting beautifully with the creamy white base.

The next step is crucial to the truffle-making process. You’ll carefully roll the chocolate-blueberry mixture into bite-sized spheres, each one a tiny masterpiece in the making. Patience is key during this step to ensure that the truffles are evenly shaped and maintain their round form. After rolling, the truffles are given a brief rest in the refrigerator, a necessity to firm up their texture. While waiting, you can anticipate the moment when these delicious treats will be ready to tantalize your taste buds.

Once chilled, the transformation continues as you dip each truffle into more melted white chocolate, creating a thin, glossy coating that envelopes the delicate filling. To finish, a sprinkle of freeze-dried blueberry powder adds a hint of color and a subtle crunch, elevating both the appearance and texture of these exquisite confections.

These white chocolate blueberry truffles are not just a treat for the taste buds; they are a feast for the eyes as well. Their elegant appearance makes them a perfect addition to any dessert table or a delightful gift for chocolate enthusiasts. Enjoy them with a cup of tea or as a special treat after a meal, and savor the explosion of flavors as the smooth white chocolate and the burst of blueberries dance on your palate.

Cheesy Baked Fajita Chicken

Why You’ll Love This Recipe

Get ready to transform your dinner routine with this mouthwatering Cheesy Baked Fajita Chicken! This dish combines the vibrant flavors of classic fajitas with the comforting richness of melted cheese, creating a meal that’s both exciting and satisfying. Whether you’re looking for a quick weeknight dinner or a crowd-pleasing recipe for family gatherings, this dish checks all the boxes: it’s easy to prepare, packed with flavor, and sure to become a new favorite in your recipe collection.

The magic of this recipe lies in its simplicity and bold taste profile. Juicy chicken breasts are coated with a blend of fajita spices, nestled among colorful bell peppers and onions, then topped with a generous layer of melty cheese. The result is a one-pan wonder that delivers maximum flavor with minimal effort.

Ingredients

For the Chicken

  • 4 boneless, skinless chicken breasts
  • 2 tablespoons olive oil
  • 2 teaspoons chili powder
  • 1 teaspoon ground cumin
  • 1 teaspoon smoked paprika
  • 1 teaspoon garlic powder
  • Salt and black pepper to taste

For the Fajita Vegetables

  • 2 bell peppers (mix of red, green, and yellow), sliced
  • 1 large red onion, sliced
  • 2 tablespoons olive oil
  • Salt and pepper to taste

For the Cheese Topping

  • 1½ cups shredded Mexican blend cheese
  • ½ cup shredded Monterey Jack cheese

Optional Garnishes

  • Fresh cilantro, chopped
  • Lime wedges
  • Sour cream
  • Sliced jalapeños

Directions

  1. Preheat and Prepare
  • Preheat your oven to 400°F (200°C)
  • Line a large baking sheet with parchment paper or aluminum foil
  1. Season the Chicken
  • In a small bowl, mix chili powder, cumin, smoked paprika, garlic powder, salt, and pepper
  • Brush chicken breasts with olive oil
  • Generously coat chicken with the spice mixture
  1. Prepare the Vegetables
  • Toss sliced bell peppers and onions with olive oil
  • Season with salt and pepper
  1. Assemble the Dish
  • Spread vegetables evenly on the baking sheet
  • Place seasoned chicken breasts on top of the vegetables
  • Ensure chicken and vegetables are in a single layer
  1. Bake
  • Bake for 20-25 minutes, or until chicken is cooked through (internal temperature of 165°F/74°C)
  • Remove from oven and sprinkle cheese over chicken and vegetables
  • Return to oven for 3-5 minutes until cheese is melted and bubbly
  1. Serve
  • Let rest for 5 minutes
  • Garnish with fresh cilantro
  • Serve with lime wedges and optional toppings

Servings and Timing

  • Prep Time: 15 minutes
  • Cook Time: 25-30 minutes
  • Total Time: 45 minutes
  • Servings: 4 people

Variations

  1. Protein Alternatives
  • Substitute chicken with:
    • Shrimp
    • Tofu
    • Lean beef strips
  1. Dietary Modifications
  • Low-Carb: Serve over cauliflower rice
  • Gluten-Free: Ensure all spices are certified gluten-free
  • Dairy-Free: Use dairy-free cheese alternatives
  1. Spice Level Adjustments
  • Mild: Reduce chili powder
  • Spicy: Add extra cayenne pepper or diced jalapeños
  • Extra Kick: Drizzle with hot sauce before serving

Storage and Reheating

Refrigeration

  • Store in an airtight container
  • Refrigerate within 2 hours of cooking
  • Consume within 3-4 days

Reheating Methods

  1. Oven
  • Preheat to 350°F
  • Cover with foil
  • Heat for 10-15 minutes
  1. Microwave
  • Use 50% power
  • Heat in 30-second intervals
  • Stir between intervals to ensure even heating

Freezing

  • Can be frozen for up to 2 months
  • Thaw overnight in refrigerator before reheating

FAQs

Q: Can I use frozen chicken?
A: Thaw completely before cooking and pat dry to ensure proper seasoning and even cooking.

Q: What if I don’t have all the specific cheeses?
A: Use any melting cheese you have on hand. Cheddar, provolone, or mozzarella work well.

Q: How do I know the chicken is fully cooked?
A: Use a meat thermometer. Chicken should reach an internal temperature of 165°F (74°C).

Q: Can I make this ahead of time?
A: Prepare the seasoned chicken and chopped vegetables separately and store in the refrigerator. Assemble and bake when ready to eat.

Conclusion

This Cheesy Baked Fajita Chicken is more than just a meal—it’s a celebration of flavor, simplicity, and comfort. With its perfect blend of spices, colorful vegetables, and gooey cheese, it transforms an ordinary dinner into an extraordinary experience. Whether you’re a busy parent, a cooking novice, or a seasoned chef, this recipe promises to delight your taste buds and become a staple in your culinary repertoire.

Remember, cooking is an art, and recipes are mere guidelines. Don’t be afraid to experiment, adjust to your taste, and most importantly, enjoy the process. Happy cooking!

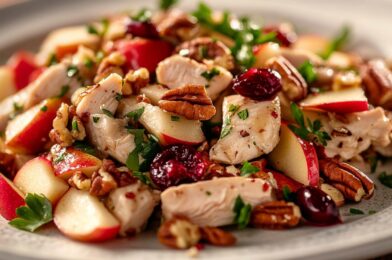
Apple Chicken Salad >

Why This Apple Chicken Salad Recipe Will Become Your Favorite

This Apple Chicken Salad brings together the perfect balance of sweet and savory flavors, creating a refreshing yet satisfying dish that’s ideal for lunch or a light dinner. The crisp sweetness of fresh apples pairs beautifully with tender chicken, while crunchy celery and pecans add wonderful texture. What makes this recipe truly special is its versatility – it’s elegant enough for a ladies’ luncheon but simple enough for a quick weekday meal. Plus, it’s packed with protein and fresh ingredients, making it a healthier alternative to traditional mayonnaise-heavy salads.

Essential Ingredients for the Best Apple Chicken Salad

  • 3 cups cooked and diced chicken breast
  • 2 medium Honeycrisp or Granny Smith apples, diced
  • 3/4 cup celery, finely chopped
  • 1/2 cup red onion, finely diced
  • 1/2 cup pecans, toasted and chopped
  • 1/3 cup dried cranberries
  • 3/4 cup mayonnaise
  • 2 tablespoons Dijon mustard
  • 2 tablespoons honey
  • 1 tablespoon fresh lemon juice
  • 1/2 teaspoon sea salt
  • 1/4 teaspoon freshly ground black pepper
  • 1/4 teaspoon dried thyme

How to Make Homemade Apple Chicken Salad

  1. Begin by preparing the dressing. In a large bowl, whisk together mayonnaise, Dijon mustard, honey, lemon juice, salt, pepper, and dried thyme until well combined and smooth.
  2. Add the diced chicken to the bowl with the dressing and toss to coat evenly.
  3. Core and dice the apples into small, bite-sized pieces. Immediately add them to the chicken mixture to prevent browning.
  4. Add the chopped celery, red onion, toasted pecans, and dried cranberries to the bowl.
  5. Gently fold all ingredients together until everything is evenly distributed and coated with the dressing.
  6. Cover and refrigerate for at least 30 minutes before serving to allow the flavors to meld together.

Creamy Chicken Apple Salad Yield and Prep Time

  • Prep Time: 20 minutes
  • Chill Time: 30 minutes
  • Total Time: 50 minutes
  • Servings: 6-8 portions
  • Serving Size: Approximately 1 cup

Delicious Apple Chicken Salad Variations

  • Make it lighter by using Greek yogurt in place of half the mayonnaise
  • Swap pecans for walnuts or almonds for a different crunch
  • Use rotisserie chicken for a time-saving shortcut
  • Add halved green grapes for extra sweetness
  • Make it dairy-free by using plant-based mayonnaise
  • Add fresh herbs like dill or tarragon for additional flavor
  • Include diced avocado for extra creaminess

How to Store Your Chicken Apple Salad

This Apple Chicken Salad will keep well in an airtight container in the refrigerator for up to 3 days. The apples may slightly brown over time, but the lemon juice in the dressing helps prevent excessive oxidation. For best results, if preparing in advance, you might want to add the apples just before serving. No reheating is necessary as this is meant to be enjoyed cold. If the salad seems a bit dry after storage, you can refresh it with a small amount of mayonnaise or a squeeze of lemon juice.

Frequently Asked Questions About Apple Chicken Salad

Can I make this recipe ahead of time?
Yes, you can prepare this salad up to 24 hours in advance, though it’s best to add the apples and nuts just before serving to maintain their crunch.

What type of apples work best?
Honeycrisp, Granny Smith, or Fuji apples work well as they’re crisp and hold their shape. Avoid softer varieties like Red Delicious.

How can I ensure my apples don’t brown?
The lemon juice in the dressing helps prevent browning, but you can also toss the diced apples in additional lemon juice before adding them to the salad.

Can I use canned chicken?
While fresh or rotisserie chicken is preferred, you can use canned chicken in a pinch. Just be sure to drain it well.

Fresh Apple Chicken Salad Recipe Tips

This Apple Chicken Salad is a delightful combination of flavors and textures that’s sure to become a regular in your recipe rotation. It’s perfect for meal prep, picnics, or elegant luncheons, and its versatility means you can easily adjust it to your taste preferences or dietary needs. The balance of protein-rich chicken, fresh fruit, and crunchy vegetables makes it a nutritious choice that doesn’t sacrifice flavor. Whether served on a bed of lettuce, between slices of crusty bread, or straight from the bowl, this salad is sure to impress.

Cinnamon-Sugar Pizza made with Crescent Rolls

Why You’ll Love This Recipe

Cinnamon-Sugar Pizza made with Crescent Rolls is a delightful fusion of two beloved treats: the soft flakiness of crescent rolls and the warm, comforting flavors of cinnamon sugar. Whether you’re looking for a quick dessert, a special treat for brunch, or an indulgent snack, this recipe checks all the boxes. It’s easy to make, uses simple ingredients, and comes together in under 30 minutes. The best part? The gooey, caramelized cinnamon topping paired with the golden-brown crust is guaranteed to please everyone at the table.

Ingredients

Here’s what you’ll need to create this delicious Cinnamon-Sugar Pizza:

  • 1 can (8 oz) of crescent roll dough
    (Look for refrigerated crescent rolls for convenience.)
  • 2 tablespoons of unsalted butter, melted
    (Adds richness and helps the cinnamon sugar adhere.)
  • 1/4 cup of granulated sugar
    (Provides sweetness.)
  • 1 teaspoon of ground cinnamon
    (The star ingredient that gives this dish its signature flavor.)
  • 1/4 cup of brown sugar
    (Adds a hint of molasses and depth of flavor.)
  • 1/4 teaspoon of vanilla extract
    (Optional, for a touch of warmth.)
  • Optional toppings: powdered sugar glaze or whipped cream.

Directions

1. Preheat the Oven
Preheat your oven to 375°F (190°C). Line a baking sheet or pizza pan with parchment paper to prevent sticking.

2. Prepare the Dough
Open the crescent roll can and carefully unroll the dough onto the prepared pan. Pinch together the seams to form one continuous sheet. If you’re using a pizza pan, shape the dough into a circle; otherwise, leave it in a rectangle.

3. Make the Cinnamon-Sugar Mixture
In a small bowl, mix the granulated sugar, brown sugar, and cinnamon until well combined.

4. Add Butter and Cinnamon Sugar
Brush the melted butter evenly over the dough, ensuring all areas are covered. Sprinkle the cinnamon-sugar mixture generously over the buttered dough, spreading it evenly to coat every inch.

5. Bake
Place the prepared dough in the preheated oven and bake for 10–12 minutes, or until the edges are golden brown and the sugar has melted into a gooey topping.

6. Optional Glaze
While the pizza is baking, prepare a quick powdered sugar glaze by mixing powdered sugar with a splash of milk or water. Once the pizza is out of the oven, drizzle the glaze on top for added sweetness.

7. Serve
Allow the pizza to cool for 5 minutes before slicing into squares or wedges. Serve warm, with optional whipped cream or ice cream.

Servings and Timing

  • Servings: This recipe yields 6–8 slices, depending on how you cut it.
  • Prep Time: 10 minutes.
  • Cook Time: 10–12 minutes.
  • Total Time: 20–25 minutes.

Variations

This Cinnamon-Sugar Pizza is versatile and can be customized to suit your taste or the occasion. Here are a few ideas:

  1. Add Fruits: Sprinkle diced apples or pears over the cinnamon-sugar topping before baking for a fruity twist.
  2. Nutty Delight: Add chopped pecans or walnuts for extra crunch and nutty flavor.
  3. Chocolate Drizzle: Instead of a powdered sugar glaze, drizzle melted chocolate over the baked pizza for a decadent touch.
  4. Cream Cheese Base: Spread a thin layer of sweetened cream cheese on the dough before adding the cinnamon-sugar mixture for a tangy, creamy element.
  5. Spiced Up: Add a pinch of nutmeg, cardamom, or pumpkin spice to the cinnamon-sugar mixture for a more complex flavor profile.

Storage and Reheating

If you happen to have leftovers (though it’s unlikely!), here’s how to store and reheat your Cinnamon-Sugar Pizza:

  • Storage:
    Allow the pizza to cool completely, then store in an airtight container at room temperature for up to 2 days. For longer storage, refrigerate it for up to 5 days.
  • Reheating:
    • Oven: Preheat your oven to 350°F (175°C). Place the slices on a baking sheet and warm for 5–7 minutes until heated through.
    • Microwave: Heat individual slices on a microwave-safe plate for 10–15 seconds.
    • Air Fryer: Heat at 350°F (175°C) for 2–3 minutes for a slightly crispier texture.

FAQs

1. Can I use homemade dough instead of crescent rolls?
Absolutely! Homemade dough will work wonderfully if you have the time. Roll it out thinly, and proceed with the recipe as directed.

2. What’s the best way to serve this pizza?
Serve it warm, fresh out of the oven. Pair it with whipped cream, vanilla ice cream, or a drizzle of caramel sauce for an extra indulgent treat.

3. Can I make this recipe ahead of time?
While it’s best enjoyed fresh, you can prepare the dough and topping separately a few hours in advance. Assemble and bake just before serving for optimal freshness.

4. Is this recipe suitable for kids?
Yes! Kids love the sweet, cinnamon-sugar flavor. Plus, they can help sprinkle the topping and make it a fun family activity.

5. Can I freeze the baked pizza?
You can! Wrap individual slices in plastic wrap and store them in a freezer-safe bag for up to 2 months. Reheat in the oven or air fryer before serving.

Conclusion

Cinnamon-Sugar Pizza made with Crescent Rolls is a treat that combines simplicity with irresistible flavor. It’s perfect for satisfying your sweet tooth without spending hours in the kitchen. Whether you’re hosting a brunch, celebrating a special occasion, or just indulging in a quiet moment at home, this recipe delivers warmth, sweetness, and nostalgia in every bite. So, roll up your sleeves, gather your ingredients, and get ready to enjoy a slice of cinnamon-sugar heaven!

Blueberry Cottage Cheese Breakfast Bake

Why You’ll Love This Recipe

The Blueberry Cottage Cheese Breakfast Bake is the perfect combination of delicious and nutritious. It’s a delightful morning dish that’s packed with protein, bursting with sweet blueberries, and wonderfully creamy. Whether you’re preparing breakfast for your family or meal-prepping for the week, this bake will become a staple in your recipe collection. Its versatility allows it to shine as a standalone breakfast or as part of a brunch spread. Plus, it’s gluten-free and easily customizable, making it a crowd-pleaser for all dietary preferences.

Ingredients

To create this wholesome and flavorful bake, you’ll need the following ingredients:

  • 1 cup cottage cheese – The key ingredient for a creamy texture and a protein boost.
  • 2 large eggs – Adds structure and richness to the bake.
  • ½ cup milk – Helps bind the ingredients together.
  • 2 tablespoons maple syrup or honey – A touch of natural sweetness.
  • 1 teaspoon vanilla extract – Enhances the overall flavor.
  • ½ teaspoon ground cinnamon – Adds warmth and depth to the dish.
  • 1 cup rolled oats – A hearty base for the bake.
  • 1 teaspoon baking powder – Provides lightness and helps the bake rise.
  • Pinch of salt – Balances the flavors.
  • 1 cup fresh or frozen blueberries – Bursts of fruity goodness.
  • Optional toppings – Chopped nuts, shredded coconut, or additional maple syrup for serving.

Directions

  1. Preheat Your Oven: Set your oven to 350°F (175°C) and grease a medium-sized baking dish or line it with parchment paper for easy cleanup.
  2. Prepare the Wet Ingredients: In a large mixing bowl, whisk together the cottage cheese, eggs, milk, maple syrup (or honey), vanilla extract, and cinnamon until smooth.
  3. Combine the Dry Ingredients: In a separate bowl, mix the oats, baking powder, and a pinch of salt.
  4. Bring It All Together: Gradually add the dry ingredients to the wet mixture, stirring until well combined. Gently fold in the blueberries.
  5. Transfer to Baking Dish: Pour the mixture into your prepared baking dish, spreading it out evenly.
  6. Bake to Perfection: Place the dish in the oven and bake for 35–40 minutes, or until the top is golden brown and the center is set.
  7. Cool and Serve: Allow the bake to cool slightly before cutting it into portions. Serve warm with your favorite toppings, or let it cool completely for a grab-and-go breakfast option.

Servings and Timing

  • Servings: This recipe yields approximately 4–6 servings, depending on portion size.
  • Preparation Time: 10 minutes
  • Cook Time: 35–40 minutes
  • Total Time: About 50 minutes

Variations

One of the best things about this breakfast bake is its adaptability. Here are a few variations to suit your taste:

  • Berry Mix: Swap out some of the blueberries for raspberries, blackberries, or strawberries for a mixed berry version.
  • Nutty Crunch: Stir in chopped nuts like almonds, walnuts, or pecans for added texture and flavor.
  • Chocolate Lover’s Twist: Add a handful of dark chocolate chips for a sweet indulgence.
  • Spiced Up: Incorporate nutmeg, cardamom, or ginger for a warming spice profile.
  • Dairy-Free Option: Use plant-based cottage cheese and almond or oat milk for a dairy-free version.

Storage and Reheating

The Blueberry Cottage Cheese Breakfast Bake is great for meal prep. Here’s how to store and reheat it:

  • Refrigeration: Store leftovers in an airtight container in the refrigerator for up to 4–5 days.
  • Freezing: For longer storage, wrap individual portions in plastic wrap and place them in a freezer-safe bag. They’ll keep well for up to 2 months.
  • Reheating: To enjoy leftovers, reheat a slice in the microwave for about 30–60 seconds. If frozen, thaw overnight in the refrigerator before reheating.

FAQs

1. Can I use frozen blueberries instead of fresh ones?
Yes, frozen blueberries work well in this recipe. There’s no need to thaw them, but you may need to add a couple of extra minutes to the baking time.

2. Can I make this recipe vegan?
You can try substituting the eggs with flax eggs and using a plant-based cottage cheese and milk. Keep in mind that the texture may differ slightly.

3. What if I don’t have rolled oats?
Quick oats can be used as a substitute, but avoid steel-cut oats as they require a longer cooking time.

4. Can I prepare this the night before?
Absolutely! Assemble the ingredients in the baking dish, cover it, and refrigerate overnight. In the morning, bake it fresh for a warm breakfast.

5. Is this recipe kid-friendly?
Yes, this recipe is a hit with kids! The natural sweetness of the blueberries and maple syrup makes it a wholesome treat that kids will enjoy.

Conclusion

The Blueberry Cottage Cheese Breakfast Bake is a versatile, protein-packed dish that’s both delicious and nourishing. Its ease of preparation and flexibility make it ideal for busy mornings or leisurely weekend brunches. Whether you stick to the original recipe or get creative with variations, this bake is sure to become a favorite. Try it today, and enjoy a healthy, satisfying start to your day!